by Jackson Chu
We all have indispensible tools we use in science. A sturdy bucket for sampling intertidal critters and seaweeds. Our trusty calipers for measuring morphometrics. Our favorite R-package for numerical ecology. All these are important for doing science. My favorite tool for scientific communication and outreach are pretty photos! A good photo can captivate and create interest in your work and, more importantly, let you communicate science to a much greater audience.

Three classes of sponges. Left: a calcareous sponge (Sycon sp.). Middle: a carnivorous demosponge (Asbestopluma occidentalis). Right: a juvenile hexactinellid (glass) sponge (Aphrocallistes vastus). All scale bars = 1 cm. © Jackson Chu. All rights reserved.
How did I take those photos?
There are a few key ingredients: (1) a digital slr, (2) a 50mm lens or 28mm lens, (3) a reversing ring, and (4) a flash that can be used off camera. (e.g. with an off-camera sync cord)

My science photography kit.
My science photography kit.
As a graduate student living on mac and cheese, I cobbled together my used camera equipment from various online sources (e.g. eBay). The camera brand really makes no difference. I would estimate I spent ~$300 for everything: $200 for the camera, $50 for the lens, $2 for the reversing ring, and $50 for the flash. Because I am always working with small (but not microscopic) invertebrates, one trick to close-up (macro) photography is to mount the lens backwards onto the camera using the reversing ring. A 50mm lens mounted backwards onto a camera will give you a 1:1 magnification ratio (1 cm object will be 1 cm on the camera sensor). A backwards mounted 28 mm lens will give you a higher magnification ratio of 3:1. There are also other alternatives that yield similar results: macro-focusing teleconverters, extension tubes, or dedicated macro lenses. In order to get proper lighting, a flash will have to be oriented close to the object. You can do this in one of two ways. Modern day flashes can be wirelessly triggered from the camera. Otherwise, an off-camera flash cord can be used.
Most of the time I’m trying to take photos of my live study organisms. What’s worked for me is to use a shallow, flat-bottomed glass tray filled with filtered seawater. Petri dishes work great for tiny 1-cm critters like carnivorous sponges. Glass baking dishes are great for >5 cm sized critters like nudibranchs and seapigs. I usually slip my neoprene laptop sleeve underneath the tray of seawater to create a black background in my photos.
Here are some examples!

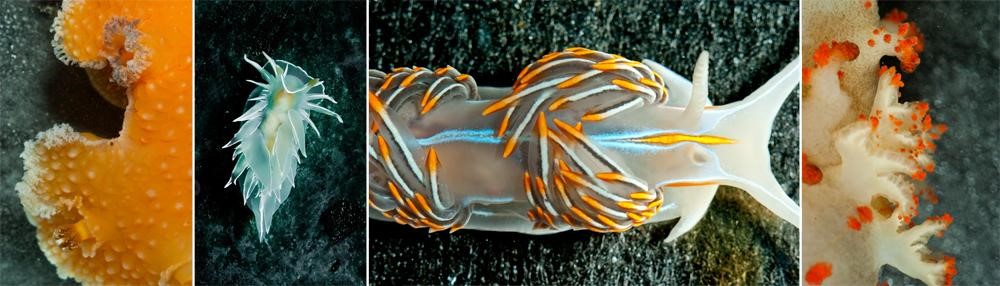
Some nudibranchs from Scott’s Bay, Bamfield. Left to right: orange peel nudibranch (Tochuina tetraquetra), white lined dirona (Dirona albolineata), opalescent nudibranch (Hermissenda crassicornis), and clown nudibranch (Triopha catalinae). © Jackson Chu. All rights reserved.

Sea piglets. Juvenile sea pigs (Scotoplanes globosa) sampled from 1500 m in the northeast Pacific Ocean. Each sea pig was ~5 cm in length. © Jackson Chu. All rights reserved.

